Fingerloop Braiding for Beginners
Fingerloop braiding was used in the late medieval period to produce lacing, hose ties, purse strings, seal tags and similar items. It’s also easy to learn, faintly addictive, and adds to your re-enactor cred.
I’ve taught the basic technique a few times, and here are the notes for it. This gives you the basic 5 loop braid and its variations. About 90% of the braids I make are one of these variations.
A short version of the technique is below – The PDF has more detailed instructions, and pictures demonstrating the technique.
Materials
Silk seems to be the most common material for the braids in archaeological finds. Silk has the advantage of being strong and smooth and capable of being dyed in a wide range of colours, which makes it perfect for decorative braids. Only a very small amount is needed, which makes it less expensive than might initially seem.
Linen or wool can be a less expensive substitute or may be more appropriate for a specific purpose (such as waxed linen for armour ties). I have recently been given evidence of both extant linen and extant wool braids, from a 15thC find. Use a non-stretchy wool thread, rather than a thick stretchy yarn.
Set-up
- Cut 5 lengths of string that are each twice your desired final length, plus about an extra 10-20cm. Form each length of thread into a loop by folding in half and tying all the ends together with one overhand knot. All loops must be the same length.
- Tie the joined end to a fixed structure such as a door handle, chair (if it won’t move) or sturdy tent pole, using a scrap piece of thread.
- Place one loop each on the index, middle and ring finger of your left hand, and on the middle and ring finger of your right hand.
In the period instructions (and many online instructions) these fingers are labelled ‘A’ ‘B’ and ‘C’, where A is your index finger, B the middle and C the ring finger of each hand. You start with a loop on each of A, B and C Left and on B and C Right. - Turn your hands so that they are thumb up, palms facing each other. Each loop now has a top edge (the bit of string above your finger) and a bottom edge (the bit of string running below your finger). Put a bit of tension on the work by pulling gently against the structure you are tied to.
Technique
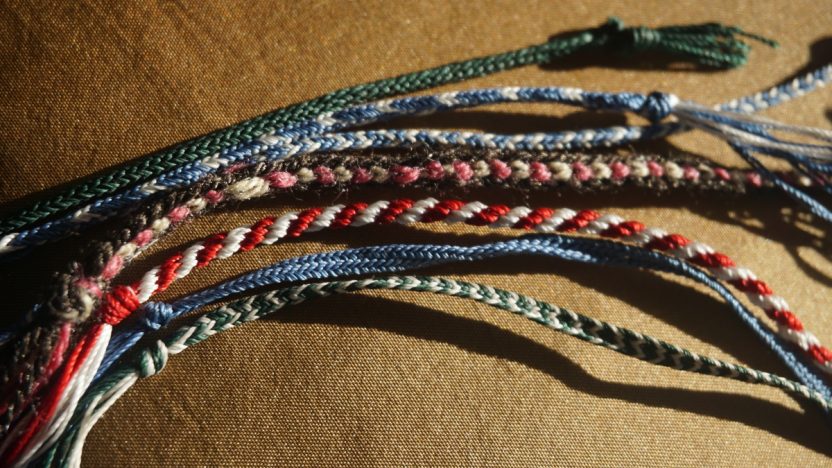
This technique produces a thin, flat braid.
- Pass your right index finger and thumb through the loop on your right middle finger. Grasp the bottom edge of the loop on your left ring finger. (A Right goes through the loop on B Right)
- Pull the loop from your left ring finger back through the other loop (B Right) so that it now sits on your right index finger. Be sure that the bottom edge of the loop has now become the top edge of the loop – this is known as ‘taking reversed’. In other words, A Right goes through B Right and takes C Left reversed
- Pull your hands apart by stretching out your arms to either side. This will pull the braid snug.
- You will now have a loop on the index and middle fingers of your left hand, and on the index, middle and ring fingers of your right hand.
“Walk down” the loops – move the loop from your left middle finger to your empty fourth finger, and the loop from your left index finger to the middle finger. - You should now have a mirror image of your starting position – one loop each on the middle and fourth finger of your left hand, and on the index, middle and fourth finger of your right hand. The index finger of your left hand should be free.
In other words, you should have a loop on B and C Left, and on A, B and C Right. - Repeat the previous steps with your left hand –use the index finger to move through the loop on the left middle finger, and take the loop from your right ring finger reversed. Walk down the loops on your right hand and tension again.
In other words, A Left through B Left takes C Right reversed. - Repeat steps 1 through 6 until you reach the right length, or run out of room. To finish, just drop the loops – it won’t unravel. You can tie a knot in the end for neatness if you prefer.
Variation
To produce a square braid – pass your index finger through both loops on the working hand, not just the first one. This is the braid pattern I use most often – its perfect for hose ties, laces, and most other re-enactment needs.
To produce two small braids at once – pass your index finger through both loops on the working hand and take the loop unreversed – i.e. grasp the top edge of the loop and ensure it remains the top edge once transferred.
To produce a broad flat lace that looks like chain links – work through both loops on the working hand, and take the bow unreversed in step 1, but reversed in step 6. This braid will want to curl, but can be flattened out.
Further variations can be made by varying the colours, creating ‘linked ‘(2-colour) loops, by adding more loops or even engaging 2 or more people in creating the braid. See the references below.
Further Resources
The Internet has a wide range of sources of fingerloop braiding, from YouTube videos to websites. There are some modern and international variations out there as well.
http://fingerloop.org/ has a range of excellent patterns, with easy to follow diagrams for most. It also links to a range of additional pages.
There is a larger range (including 14 and 16 loop braids) at http://webpages.mcgill.ca/staff/Group2/jhobbi/web/fingerloop/ . Several of these are a bit more advanced (for when you want to branch out).
Elizabeth Benns and Gina Barrett Take V Bowes Departed: A 15th Century Braiding Manual Examined is a discussion and examination of Article 4, British Library Manuscript Harley 2320 – a 15th Century manuscript which gives instructions for around 40 braids. There are interpretations of the instructions included in the later part of the book.
The ‘Museum of London’ series have excellent references, particularly for earlier archaeological examples of braids (esp. 14th Century) in the Textiles and Clothing and Dress Accessories. However, they do not offer a description of techniques.
Beatrix Nutz has published an analysis of braids from Lengberg (15thC Austrian castle find). They include several braids in flax/linen, and some in wool. Lots of basic five loop braids, in an apparently domestic context.