Making coad for shoe making
Firstly, what is coad? Coad, also known as shoemaker’s wax, is a mix of beeswax and resin, and acts as a glue when sewing leather together, helping to ensure that if one stitch is cut, the entire shoe won’t fall apart.
The coad is rubbed into all of the thread. It’s slippery when hot but very sticky at room temperature so while you’re pulling it quickly through a stitch, it runs smoothly but as soon as you pull it tight it glues up permanently.
When using coad for shoemaking, you should also burnish all the seams, as it helps to melt the coad and glue the whole seam shut.
Basically wax by itself is a lubricant, so even though it fills space and slightly waterproofs thread, it is mainly there to help the thread move through the stitch holes (and doesn’t glue it in place much at all). In order to ensure that the stitches stay firmly in place, rosin needs to be added.
A video that I did on coad making can be found here
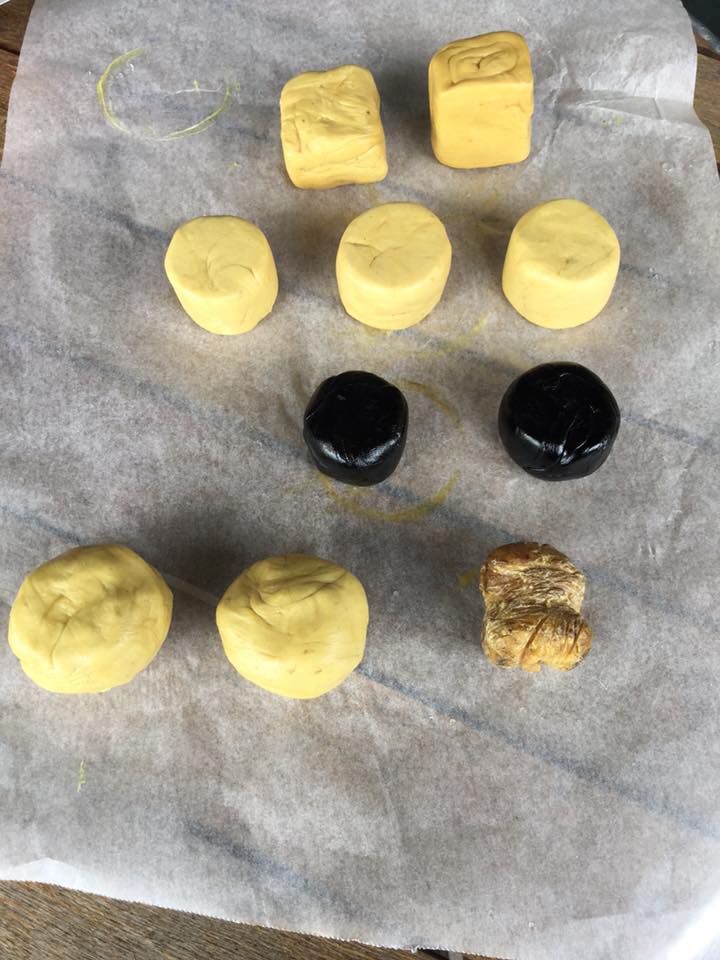
The code in the above photo were made (from top to bottom)
(a) 60g pine rosin, 30g wax (2:1) – courtesy of Al Muckart
(b) 60g pine rosin, 30g wax, ‘some’ tallow to soften
(c) 18g pine rosin, 36g pitch, 6g wax (1:2:0.333) – rosin courtesy of Wayne Robinson (sealing pitch from the UK), recipe courtesy of Francis Classe & the Crispin Colloquy
(d) a re-melt of my old recipe (3:1 rosin:wax), then added wax to make it up to 2:1 as it was too hard before. An old lump of the stuff shown next to the renewed version for comparison.
Method: combine ingredients in a ramekin, and place in the oven at 150C (electric oven, not gas!). Stir every 10min using an old knife (it’ll never be the same again). In the 10min periods, prep a cheap plastic bucket 2/3 full of water at body temp.
Remove mix from the oven as soon as it is fully melted (30-40min I found) , stir for a few minutes with the knife to let it cool a bit, then gently pour into the bucket of water.
Wet your hands then knead the coad between your palms with until it starts feeling stretchy, then taffy pull until it is a constituent colour (no streaks) and continue kneading/pulling until the coad is down to near room temp. That’s it!
Major lessons learned:
(1) bring the mix just to melting temp, no hotter. if it is bubbling (ie hotter than melting temp) stir and let cool a bit before pouring into bucket.
(2) use Luke warm water in the bucket, otherwise coad sticks to your hands badly. Using cold water would probably work ok too, though may cause rosin to crystallise before there is time to taffy-pull.
(3)Store the coad in water between uses to keep it as good as the day it was made.
These coads were made in 2016. So some notes about the coad, two years on
Top choice for me in all temp ranges I’ve tried is recipe (b) – that is, 60g rosin, 30g wax and a dash (say 5g) tallow. It works perfectly in spring/autumn/summer (temp range 20-35), gets a bit sticky above 30 degrees. For temp below 20 it needs a bit of warming in the hand to work well. Since the products being made are mostly being used in the 20-35 temp range, I’ll keep using this coad for future.
I haven’t used the pitch recipe (c) much as I have been mostly sewing on my white leather couch in the lounge, though it needs some warming up once weather goes below 20 degrees, and is slightly more crunchy than the recipe (b).
The recipe (a) is too firm and crunchy for my liking and binds a lot mid-way through pulling thread through. The only difference between that recipe and the favoured one is the addition of some tallow, which I’ll definitely be continuing to do in future batches, it seems to make a big difference!