Campfire Cooking with Ceramics – Symposium
On August 5th, Company of the Staple member Roxy talked about Campfire cooking and cooking with ceramics on a campfire. These are the notes from that talk.
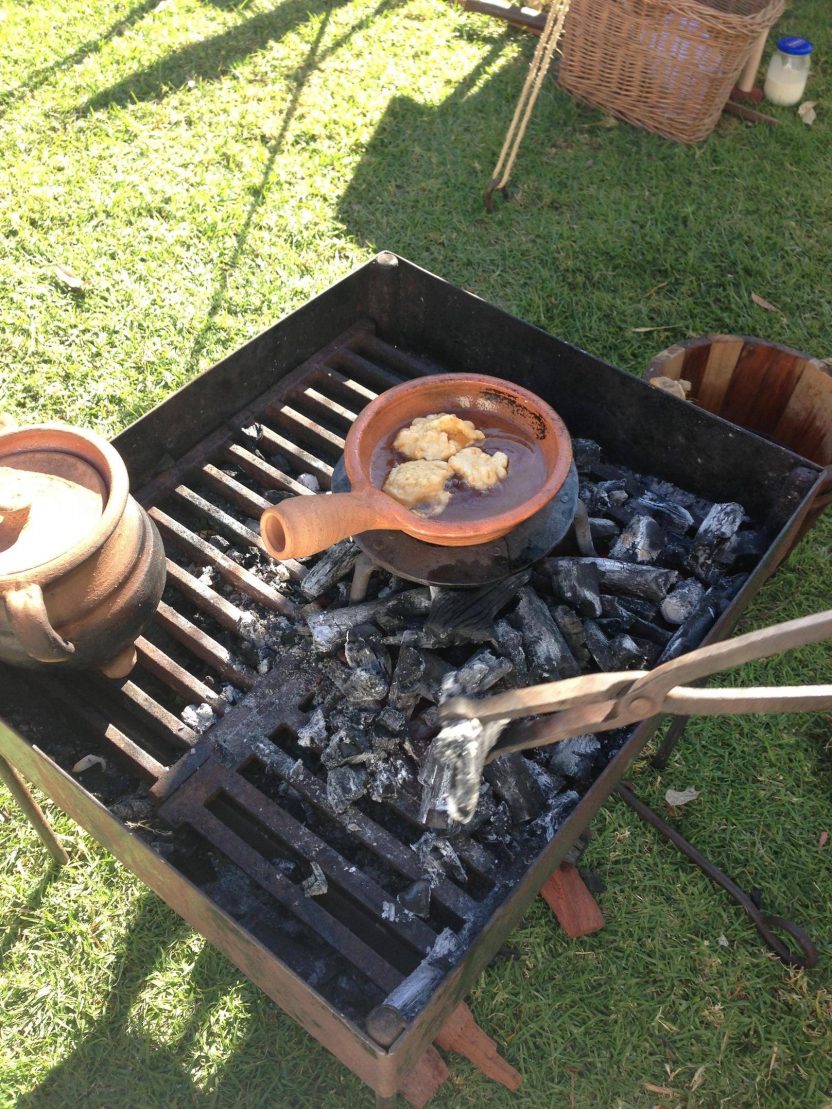
The above image is of a saucepan with oil, for deep frying cheese fritters. It is in a trivet, and being cooked with charcoal.
A copy of the recording from the chat can be found here
Campfire cooking
What is it?
Campfire cooking is the art of cooking a meal without a modern (or even a medieval) kitchen. The surviving medieval cookbooks were not designed to be cooked on a campfire – they assume the reader is using a kitchen. A modern kitchen, in pretty much all ways but one, is superior to campfire cooking. However, that one in which it is not is that you can’t take a modern kitchen onto a paddock in a car.
Comparison to modern cooking
Campfire cooking is Slow. Always double your cooking time allowance when cooking on a campfire.
The heat source unreliable for the inexperienced. It takes time to learn what temperature the fire is, as there are many factors which influence how hot the fire is. (Type of fuel, wind, how much fuel)
You aren’t in your modern kitchen, and there’s a lot of little things you don’t realise you use/need until you’re suddenly 100km away in a paddock. Preparation, patience and planning are key to campfire cooking.
Like hot water. You’ll need to have a separate vessel which is just for keeping a pot of water on the boil.
It is even more important in a campfire situation that there is a clear place to work on, and that the area around the fire, and particularly the path from fire to table is clear from all trip hazards.
Unlike a modern kitchen, you’ll need to check the weather forecast before you leave for the event. Heavy rain will make a campfire pretty much impossible without a protective shade over the fire. Fire bans will prevent the campfire from happening all together.
Choosing where to put the Campfire
Most camp areas these days will have a designated campfire area. Before planning to cook entirely or even mostly with a campfire, you should check that fire is allowed, and what the site-specific rules are.
Things to take note of in particular
- exclusion area – how many metres must the fire be away from everything? (Regardless of site rules, at least two metres should be given)
- overhead branches
- Trip hazards
- Tents
- heat reflection
- water drainage – if you put your campfire at the lowest point in the camp, if it rains, the water will pool into the fire, making it pretty hard to light and stay lit.
Rowany festival camp ground rules:
Campfires must be in a four (4) metre diameter cleared area, free from long grass, tents and overhanging trees. Only existing fire circles and braziers/above ground fire pits with appropriate protection for the ground may be used. NO pits/holes may be dug to accommodate fires.
All campsites must have a clear method for extinguishing their fire: A chemical fire extinguisher, multiple buckets of water or sand for each fire, or a fire blanket.
There are basically three types of fires:
1)A narrow trench dug in the ground is the best cooking fire. It requires the least amount of fuel, and ensures that the heat remains close to the pot. (A Dakota fire, in which there is a secondary hole which provides air to the fire can produce a very intense, focused heat without using up too much fuel) https://bushcooking.com/dakota-fire-hole/#sthash.A4k3fxPY.dpbs
2)A stone ring fire is probably the most popular kind of fire at events. It’s an entertaining fire and can result in a big bonfire with large amounts of radiating heat – which is good for cold nights.
3)For sites that don’t allow fires on the ground, or pits to be dug, a raised fire tray or box keeps the fire away from the ground. The raised sides can also prevent the wind from getting in so a bellows can be handy to ensure airflow to the fire. (see top picture for a fire box.)
Choosing a fuel source
- Green wood – grows everywhere, terrible fuel. Does not burn well and produces a lot of smoke.
- Fallen wood – limited supply, ok fuel depending on species, comes in varying sizes already.
- Seasoned firewood – good fuel, needs to be split
- Charcoal – awesome
- Heat beads – not invented.
When it comes to using wood fuels, you’ll need to either collect or split, varying grades for fast heat, even heat etc. The smaller the wood, the faster it will burn. Small wood pieces are needed to initially light the fire, and to have on hand to provide quick boosts of heat. Big pieces of wood need an already burning fire to be lit, but will burn for a longer, more consistent time.
I always recommend using charcoal over wood when it comes to campfire cooking.
The advantages are
- Charcoal burns without smoke, which is one of the biggest issues with campfire cooking, particularly for the inexperienced.
- Charcoal burns hotter, and with a bellows, (see tips for using bellows here) can be brought to high temperatures quickly, but the heat remains closer to the source, allowing the cook to work closely with the fire without being forced to move away due to heat.
- A bag of charcoal with the same energy output is lighter than a bag of firewood and is more compact meaning that a weekend supply of fuel can be transported more easily.
Disadvantages
- Harder to tell that it’s actually alight without getting close, unless actively blowing air onto the charcoal, lit and unlit look visually similar.
- Harder to set alight, as it needs an initial fire going for the charcoal to catch.
- Costs more than firewood.
- Makes a harder to clean mess while transporting.
- Needs a bellows, or airbed pump.
If charcoal is not available then dry hardwoods (oak, ironback, gum) are preferable to soft woods (pine).
A hard wood, like charcoal, will take more to catch alight but will burn at a steadier pace, allowing better fire management.
Always use dry wood. It doesn’t have to be seasoned, but green wood will cause a lot of smoke, preventing you from cooking easily. It also doesn’t burn well, and doesn’t produce a lot of heat.
Deadfall can also potentially have been affected by insects. Wood that is rotten, or eaten by insects is pretty much useless for cooking as it will burn extremely quickly without producing much energy. (As the rot or insects have taken much of the energy that would otherwise burn into heat)
Fire Management
A cooking fire needs to be started about an hour before you actually intend to cook. (For firewood. Charcoal takes about twenty minutes to get to the cooking stage – assuming the kindling has already been chopped for both.) To start, regardless of the end fuel, you’ll need tinder (such as paper or dry grass or straw.)and kindling – small twigs (10-20cm in length, no more than a cm in diametre.)
Pile the sticks into a teepee shape with the paper/straw in and around the sticks. Set the tinder alight and blow to catch the twigs alight. Continue to add slightly larger sticks until the fire is well alight. You can then add the charcoal (if using firewood, you’ll need to continue to add larger sticks/wood until you get to about 10cm in diametre)
The charcoal is ready to start cooking with once it’s alight. For firewood, you’ll need to let it burn down to it’s embers before you can truly start.
At that point, it’s then a juggling act of putting enough fuel on the firewood to continue to have enough embers to cook with, but not so much fuel that it becomes a bonfire. This is a skill that will take time to learn, as you need to be looking about half an hour ahead for where you’ll want the fire to be then. Campfire cooking is all about looking ahead to what you need in half an hour’s time. You cannot quickly change the temperature of a campfire (unlike a modern gas stove) and so you must be prepared for what you will need, not looking at what you need right now.
Why embers for cooking?
There are three main mistakes that I see people making when it comes to the actual fire
- Building a massive “chirpy” fire with the flames licking up.
- Treating the entire firepit like a stove and trying to cook where the heat isn’t.
- Once the fire is at the right point for cooking, treating it like a modern stove and not added more fuel consistent to keep the heat levels up.
You want a coal/ember bed to be cooking on
- Coals burn at a higher temperature, resulting in faster cooking
- The heat is tighter around the coals, meaning that you don’t heat yourself out when stirring or otherwise attending to the food.
- The heat is more consistent, meaning that you don’t have a cold point and a hot point.
The second mistake occurs mostly when people are trying to fry things. A fire only heats what’s above and partially what’s beside it. Having a saucepan in the opposite corner to the fire is going to result in a very slow cooking time indeed. The majority of the heat from a fire also rises above the fire itself, so ideally, the vessel will either have legs, or be on a trivet in order to be able to push embers underneath the vessel.
Campfire safety
- Keep the area around the fire clear to prevent people from tripping and falling in.
- Always have a bucket of water or a thick blanket nearby to smother the flames
- Do not allow scraps to be thrown onto the fire until the cooking is complete and the fire is allowed to become a bonfire for socialization. (scraps create smoke)
- When taking something off the fire, have a clear space to move to put it down.
- Do not use a wet tea towel to move hot items – must be dry or use a fire glove.
- You should be wearing natural fibres around the fire. Should the worst case situation happen and you accidentally fall in, wool does not easily catch alight or burn, and you will be safer for it. Synthetics catch alight remarkably easily, and it can only be a few minutes inattention, particularly with dangling sleeves and long dresses, to suddenly find yourself on fire.
- Linen aprons are also handy – they make an excellent emergency hand protection for getting things off the fire, and they will keep your clothes clean(er) as campfire cooking is a very messy business.
- All members of the camp should be aware of the basic campfire safety rules and of the overall campsite rules to ensure minimisation of the risks.
During the cooking
When to start cooking
Campfire cooking is just so much slower than cooking with a stove. If you are cooking a meat-based stew from scratch for say 20 people, (and until you get familiar with campfire cooking and are very comfortable with campfire cooking, I would recommend pre-cooking everything and using the fire to reheat – which will reduce the cooking time to be closer in line with modern cooking), then I start the fire four hours beforehand, and get the stew on as much as three hours before I’d like to be eating. Cooking a stew for a longer period over a campfire won’t hurt the stew. Undercooking the stew might hurt you.
The ability to have hot water on demand is a very overlooked joy of modern cooking. In order to have the washing up water ready when you want it, you’ll need to put the pot on to boil about an hour before washing up. (Since space can be tight depending on the type of firepit being used, I often put the water on to boil at the same time as the stew, and move it closer to the heat while the stew is being dished up and eaten.)
Balancing the pot
A lot of ceramic pots have a smooth bottom. They need to either be carefully balanced in the embers of the fire, or they need to be in a trivet. (Trivets are best anyway since they allow for the pot to be directly over the fire that can still have a good airflow over it.)
Cast pots can be suspended over a fire via a tripod and trammell.
Where to put the spoon while cooking?
I like to have a bench that is nearby (but not capable of being tripped over) where I put the spoon after I’ve stirring. If the soup is quite thick, I’ll have a bowl that the spoon goes in, in between stirring. If you leave the spoon in the pot, there’s a chance that it will get too hot to easily pick up to stir.
When it comes to moving a pot there are a few important points to consider;
First, make a clear space where the pot will be placed that is the final position. If the pot needs a trivet because it has a round bottom, put the trivet ready to receive the pot on the space.
Secondly, make sure the path from the fire to the final position is clear with no trip hazards.
Third, using dry teatowels that are folded over to make a few layers (or a fire glove), grab the pot by the handle if it has one, or if it doesn’t, by the top of the pot (cleanest and coolest space to grab)
Quickly, but without losing control of the pot, move the pot to the clear space.
Weather
One of the (many) disadvantages that campfire cooking has compared to a modern kitchen is the weather. There is some steps you can take to mitigate the effects of adverse weather.
- Light Rain – In case of sprinkling rain, there’s no cause to be alarmed. As long as you keep the kindling and tinder dry, plus the initial wood for burning, the fire will then have enough energy to burn slightly damp wood, and the heat from the fire will cause the rain to evaporate before it affects the fire. It will cause the wood to steam, which can cause irritation, but it’s not enough to adversely affect the cooking. It’s just annoying, and will add some additional time to the cooking stage.
- Medium Rain – Again, the kindling needs to be kept dry. You’ll most likely need to build a shelter (about 3m above the fire to ensure that it can’t catch – but a cooking fire doesn’t create a great deal of upward embers. Do not build a bonfire under a shelter) in order to keep the worst of the rain of the fire, and then you’ll be back to situation 1, where the fire itself can keep going without too much concern.
- Heavy Rain – Unfortunately, there’s very little you can do in case of heavy rain, aside from a situation where the fire can be completely enclosed. Keep an eye on the weather forecast, and if heavy rain is forecasted, make other arrangements aside from campfires for dinner.
- Warm Weather – Like the situation for medium rain, strong sunlight can make cooking hard to deal with. Intense sunshine, plus the requirement to constantly be close to the fair can cause heatstroke. Drink lots of water while you’re by the fire, and ideally, have a sunshade constructed either over, or close by the fire where you can monitor the fire from the shade.
- Total FireBan. In some situations, the area will have a total fire-ban, preventing all outdoor fires. (In a total fireban, gas stoves can also only be lit in areas with a concrete floor that are completely enclosed). Again, there is nothing that can be done in a total fireban situation. Check the forecast before leaving for the event, and have a back up plan for meals if a total fireban is a potential risk.
Ceramics
Ceramics vs Cast Iron
Most people will have a general idea on cooking with cast iron pots. They might have a cast iron saucepan at home. Ceramics can be scary to the inexperienced because they look more fragile than cast iron. However, ceramics hold many useful attributes versus cast iron.
Pros
Cost – At $40 for a pot, ceramics are the cheapest way to get into medieval cooking.
Weight – A similar sized cast iron pot will be heavier than a ceramic pot.
Availability – It is a lot easier to get a ceramic pot, particularly at SCA events, compared to a cast iron pot.
Heat retention – If the ceramic pot has a lid, by putting the lid on, the contents of the ceramic pot will remain hot for longer compared to the cast iron pots.
Cleaning – I have only used ceramics that had a glaze on the inside. Cleaning a pot with an inside glaze only requires hot water, soap and a scrubbing brush. Cast iron should never be cleaned with soap, or it will need to be reseasoned.
Cons
Transportation- Ceramics should be wrapped in fabric (like a tea-towel) and transported carefully to avoid breakage. Cast iron doesn’t need to be handled as delicately.
Ability to put directly on fire straight away – You cannot put a ceramic pot on the fire straight away like iron can be. You have to gradually warm the pot up (by putting it on the edge of the fire and gradually moving it in. Ingrediants go in the pot while it’s still by the edge or before it goes on the fire. Particularly if you precooked the meal and it’s still quite cold, this inital stage must be done gradually and carefully to avoid thermal shock). Similarly, the pot must be put on a trivet, or on a wooden board when pulled out of the fire, it must not go onto cold ground while still hot.
Size – Cast irons can get much bigger than ceramics which are pretty much contained to about 4L at their biggest.
Rotation – Ceramic pots do not transfer heat as well as cast iron. A stew in a cast iron needs to be stirred but a stew in a ceramic pot needs to be stirred, and the pot turned quarter turns every so often.
Speed- A cast iron pot can take hotter temperatures quicker compared to ceramics, allowing for a faster cooking time.
Durability – A ceramic pot will eventually crack no matter what. You can prolong the lifespan by soaking the pot before use (overnight before the first time being used, and for a couple of hours before each event after that. They do not need to be soaked during the event)
Handles – Cast Iron pots will often have handles making it easier to lift and carry while full of heavy hot liquid.
Additional Information
One Less Thing to hide- Washing Up
How to be helpful in a medieval kitchen